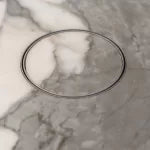
The Point Pod is a fully-integrated power outlet system that seamlessly blends into your bench top. It is the top of the range model of pop-up power outlet available from Modern Power Solutions.
See all Point Pod models here
Its distinctive feature is its ability to sit flush & seamless within a bench-top, allowing the bench-top cut-out to be placed in the top lid providing a very discrete finish on the surface. No other model range at Modern Power Solutions has this functionality.
In addition to the cut-out insert functionality, the Point Pod is available with USB-C and USB-A 4A charging ports, and has a motorised lifting mechanism with a button on the lid - so your bench-top cutout becomes the button to raise or lower the unit.
The Point Pod range comes with 24 months warranty through Modern Power Solutions.
About
Point Pod is a Brisbane business that has designed, developed and manufactured a new type of pop up power outlet product that enables a bench-top cutout to be placed in the lid of the product. This means Point Pod can sit flush and seamless in a kitchen or workspace.
The Point Pod has been available in Australia since approximately 2018, and has won multiple awards including the Good Design award in 2019.

Installation
Note; the Point Pod is recommended to be installed by tradesperson only.
How to install the Point Pod?
- Determine a suitable location for your Point Pod installation. Ensure there is amble free space under and above the bench-top, along with power access for the Point Pod to plug-in.
- Use the outer ring (or collar) that comes with the Point Pod to mark the installation hole with a pencil on your bench-top.
- Double check all measurements again to ensure your Point Pod will fit in this location.
- Drill the hole in the bench-top of 102mm in diameter. A modified drill press clamped to your bench-top is best to ensure the accuracy and quality of the hole. For stone, it may also be useful to use a plywood template. See video above for more information.
- Ensure the off-cut is saved from the hole drilling process. File away any imperfections on the off-cut to ensure its consistency round and smooth.
- Silicon in place the outer ring (collar) to the hole in your bench-top. Wait for the silicon adhesive to dry before moving on to the next step.
- Next, glue the plastic flange to the underside of your bench-top. Two part epoxy is a great adhesive for stone. Wait for the adhesive to dry before moving on to the next step.
- Grab your Point Pod and drop it down into the hole from the top. Set the height to align with the stone and then tighten the large hose clump on the plastic flange to secure the Point Pod.
- Connect the Point Pod to power, raise it up, then disconnect it from power.
- Adjust the screws inside the top cup on the lid to ensure your bench-top insert fits well and flush. Once fitted well, remove it to add adhesive and secure it in position.
- Reconnect the Point Pod to power and you are good to go!
Liquid Spills on Point Pod
One of the most common questions we get asked is what happens if I spill something on my Point Pod? Watch the video below to find out what to do:
What happens if I spill liquid over the Point Pod?
The way the Point Pod is designed and installed in the bench-top means liquid is expelled away from the unit when it is in the closed position. The mounting-flange that is installed under the bench-top has weep holes around the outside that divert liquid away from the unit. However, liquid will still need to be dried under your bench-top in the cabinets, and obviously above on your bench-top too.


